


With the advancement in IoT, Home automation System is becoming a very popular and demanding concept. There are already many Home Automation platforms that allow users to control all the smart appliances using a standalone device; Tasmota is one of them. Tasmota was initially launched for sonoff devices but now Tasmota can be used with any ESP266 device. It allows easy and seamless integration with hundreds of smart home products and protocols.
So in this tutorial, we are going to flash Tasmota firmware on ESP8266-01. Then we will configure the Tasmota to control Neopixel LED. Later on, we will also integrate the Tasmota device with Home Assistant using MQTT. We have also previously built many IoT Home Automation projects; check them out if you are interested.
Components Required for Flashing Tasmota
- ESP8266-01
- Arduino Uno
- Neopixel LED
What is Tasmota?
Tasmota is an open-source custom firmware that runs on any ESP8266 device. It provides local control of the connected device through MQTT, HTTP, Serial, or WEB UI. Tasmota initially started as a custom firmware for sonoff devices but it transformed into an incredibly powerful tool for controlling everything within the ESP chip. It comes with built-in drivers to control many popular sensors and chips. Tasmota also has an option to configure devices in case you want to add a device that is not on the list of built-in devices.
Flashing Tasmota on ESP-01
There are generally two methods for flashing Tasmota on ESP-01. One is Over the Air (OTA) and the other is using FTDI or Arduino Uno. In this project, we are going to use Arduino Uno for Flashing Tasmota on ESP-01.
Step1: Preparing Hardware
To flash a new firmware on ESP-01, connect ESP-01 with Arduino Uno as per the circuit diagram.
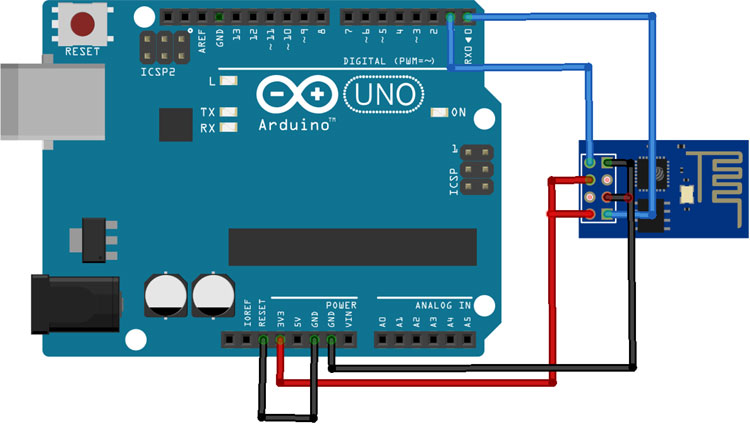
Connect the VCC and GND of ESP-01 to 3.3V and GND of Arduino; also connect CH_PD to 3.3V and GPIO_0 to GND of Arduino. Connect RX and TX of ESP-01 to RX & TX of Arduino Uno, respectively. GPIO_0 is grounded to enable the flashing mode of ESP8266-01. After making the circuit as per the diagram, connect the Reset pin of the Arduino to GND to bypass the Arduino. It will disable Arduino and upload the firmware directly to the ESP-01. Connect RST pin of ESP-01 to ground, remove the RST after half a second (the blue LED flashes for some millisecond).
Step 2: Tasmota Firmware Download
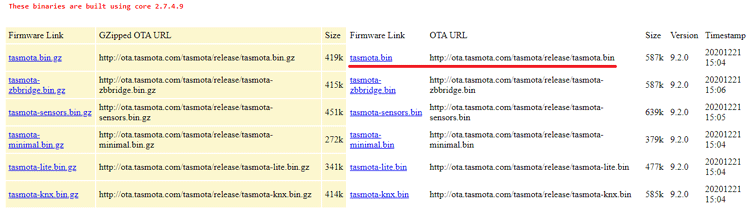
Now in the next step, download the Tasmota firmware file from http://ota.tasmota.com/tasmota/release/. There is a big list of firmware files. The difference between these bin files is that each one includes different built-in drivers for various sensors and other devices. If you're not sure which binary is the right one for you, just start with “tasmota.bin”. It includes all the features required for the majority of compatible hardware.
Step 3: Download and Install Tasmotizer
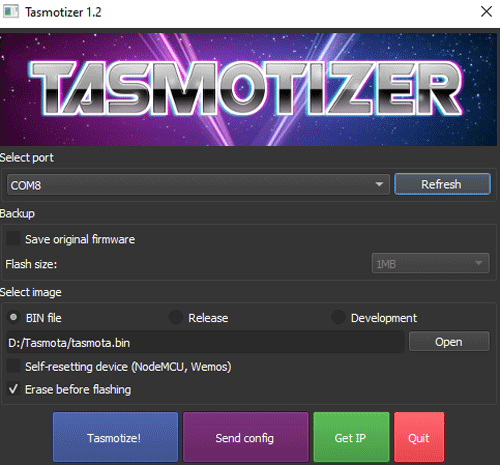
Tasmotizer is a specifically designed flashing tool for Tasmota. Download the latest Tasmota version for your platform. After downloading, double click the downloaded file and it'll start; no installation required.
Step4: Flashing the Tasmota Firmware
Now in the final step, select the port to which Arduino Uno is connected. Then browse to the Tasmota firmware binary you downloaded. You can take a backup of your original firmware by checking in the “Save original firmware” option. Click Tasmotize! and wait until it is done.
Step 5: Configure Wi-Fi
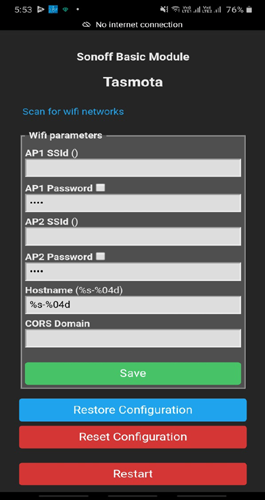
Once you have finished flashing the Tasmota Firmware, disconnect the GPIO-0 pin, then disconnect the ESP-01 power, and reconnect it. When the Tasmota firmware starts up, it provides a wireless access point for easy Wi-Fi configuration. It will have a name similar to “tasmota_XXXXXX-####”.
Connect to this Tasmota network using your Smartphone or laptop, and open http://192.168.4.1 in a web browser. It will take you to the Tasmota configuration page automatically. Enter Wi-Fi name in AP1 SSID box and Wi-Fi password in the AP1 Password box. You can also enter an alternative Wi-Fi in the next boxes. Click on 'Save' to apply the changes. The ESP8266 Tasmota device will restart and connect to the Wi-Fi network that you provided.
Controlling Neopixel using Tasmota
Once the Wi-Fi configuration is done, use an IP scanner to find the IP address of your Tasmota device. Enter the IP address into your browser URL and click Enter. It will take you to the Tasmota page.
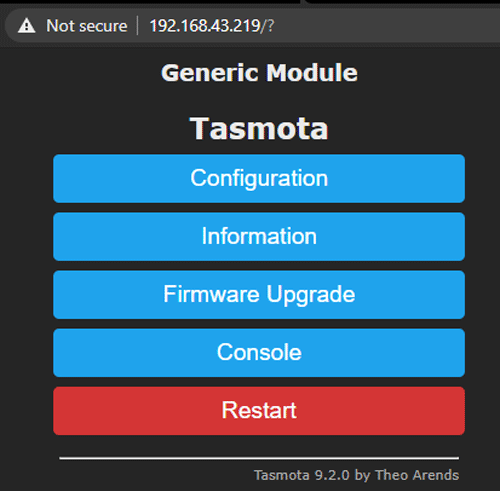
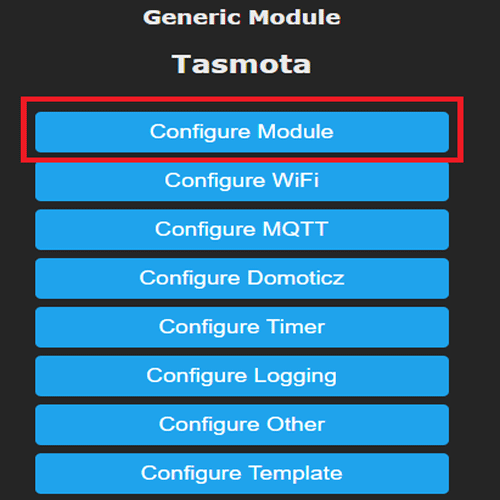
To control the LED with Tasmota, we need to configure the module. For that, go to “Configuration” and then “Configure Module”
By default, the module type will be ‘Generic (0)’. So, you need to change it to ‘Generic (18)’. Then in GPIO 2, I selected ‘PWM’ to control LED and DHT11 on GPIO0, you can change it to Relay, Neopixel, or any other sensor.
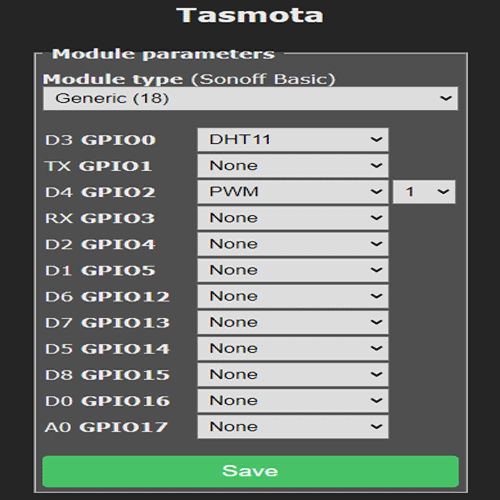
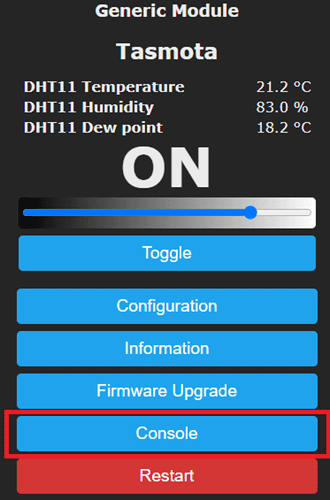
After that, click on ‘Save’ to save the changes. The ESP-01 will restart. Then go to Main Menu and you will have fully functional LED controls on your Tasmota Web UI. Use the slider to change the LED brightness and the Toggle switch to turn on and off the LED.
![]()
Ok, so till now we flashed Tasmota firmware on ESP-01 and controlled a LED and DHT11 using the Tasmota device. Now, we are going to integrate Tasmota with Home Assistant. If you are new to Home Assistant, then follow our previous tutorial on Getting Started with Home Assistant.
Integrating Tasmota with Home Assistant
We are going to configure MQTT on Tasmota and Home Assistant so that the Tasmota device will auto-discover in Home Assistant. So, the first step will be installing the MQTT add-on on Home Assistant. Skip this step if you already installed MQTT on Home Assistant.
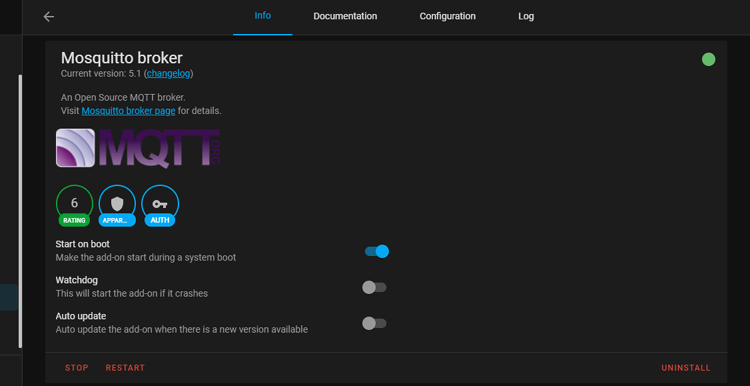
Open up Home Assistant in your browser and navigate to the Supervisor tab in the left-hand menu. Then click Add-on Store at the top of the page and search for Mosquito Broker.
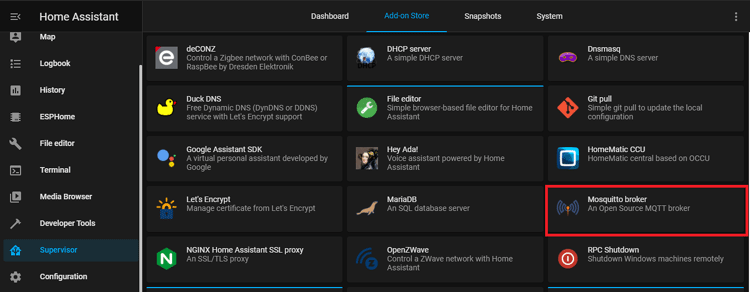
Now open the Mosquito MQTT Broker add-on and then click install. Once installed, click on Start, to start the Mosquito broker.
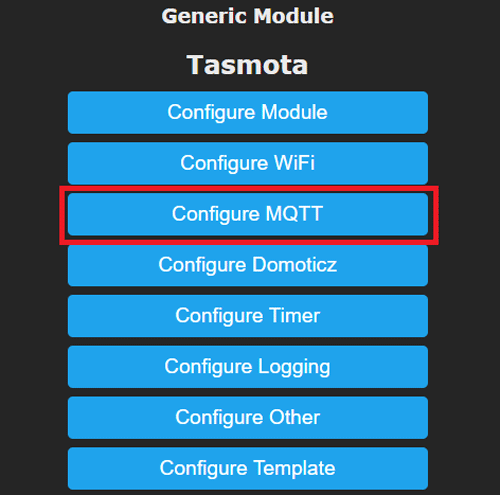
Now, navigate to your Tasmota Web UI and go to “Configuration” and then “Configure MQTT”
Now enter your Home Assistant server IP address under the host. Default port 1883 is already entered. Next, enter the MQTT broker username and password. Then enter the Topic name. This topic name will be used to communicate with the MQTT broker.
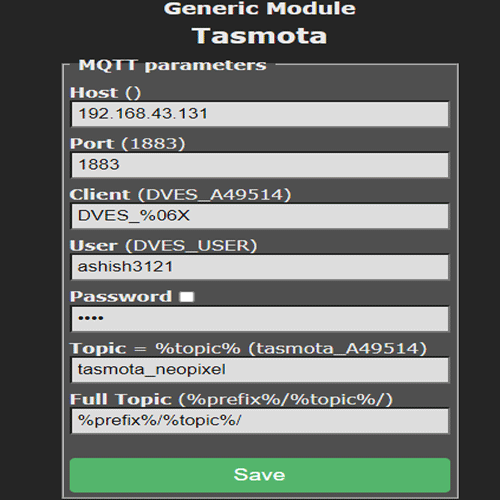
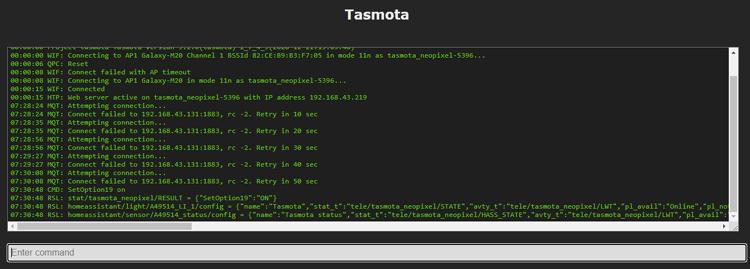
Now click on 'Save' and the Tasmota will restart. Then go to Console.
Now, to turn on discovery mode on the Tasmota device, enter the following command in the Tasmota console and press 'Enter'.
SetOption19 on
Once you enter this command, your console screen will look something like this.
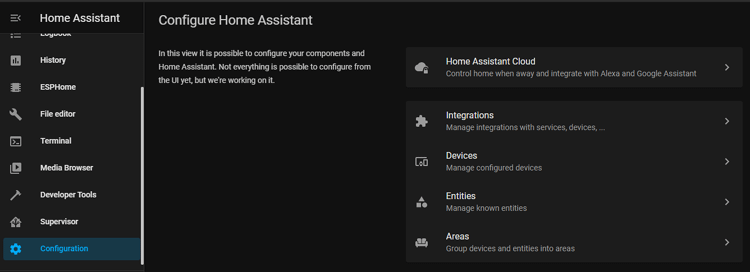
Now, again go to your Home Assistant Web UI, on the left-hand menu, click on Configuration to load the configuration page. Then go to Integrations.
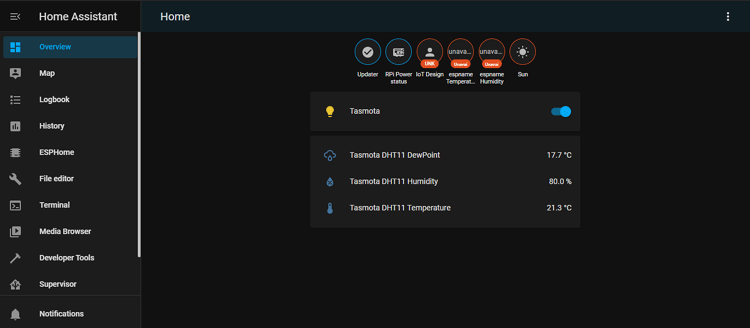
Now on the Integrations page, click on MQTT and you will find a list of all the devices discovered by Home Assistant. If you didn’t turn on the Edit mode on your Dashboard, Tasmota will be visible on the overview page. Otherwise, add it manually.
This is how you can Flash Tasmota firmware on ESP8266-01 and integrate it with Home Assistant. A complete working video is given below. If you have any questions, please let me know in the comments below.


