


CCTV cameras are very common now days and they are good tool to monitor and surveillance the home or office for any mishapenings. But still IP cameras, which provide video feed accessible from anywhere, are costlier. So here is one cheaper solution using Raspberry Pi- How about setting up a cheaper Raspberry Pi security camera system? This can be done easily and you don’t have to spend too much…
Here we are building Home Surveillance System using Raspberry Pi with two Raspberry Pi and Pi cameras. Both PI’s are connected to the same local network for live streaming. One can add multiple Raspberry Pi’s with cameras. Pi camera can be easily connected and configured with Raspberry PI, here we have previously built Smart Wi-Fi doorbell using Raspberry Pi and PiCamera.
In this project, we will be using Motion eye OS; an open source operating system available for Raspberry Pi to convert it to a smart surveillance system. It supports multiple system on board devices similar to Raspberry Pi (Banana PI, Orange PI One etc.). It comes with advanced features like fast network video streaming, motion detection and notification, integration with dropbox and Google drive, uploading videos and images to the cloud and many more.
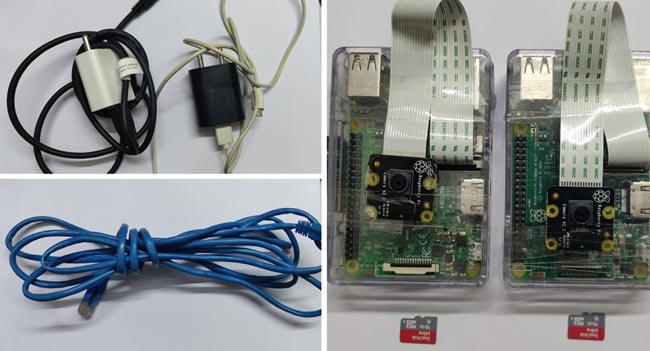
Assembly Line
- Raspberry Pi 3 Model B or newer – 2 (You can use zero w’s as well for secondary cameras).
- MicroSD card class 10 or better – 2 (Depending on the number of Raspberry Pi ’s)
- MicroSD Card reader – 1
- Hard disc or USB drive depending on what you have.
- Raspberry Pi NOIR or normal camera – 2
- 5V 2A power supplies – 2 (depending on the number of Raspberry Pi ’s)
- Enclosures for all Raspberry Pi model B (or zero w).
- LAN cable.
Primary Camera Setup for CCTV using Raspberry Pi
Here we will be using a Raspberry Pi 3 for primary setup since it has better processing power while the zero is a little weaker in terms of specs.
Burning the motionEyeOS in Raspberry Pi
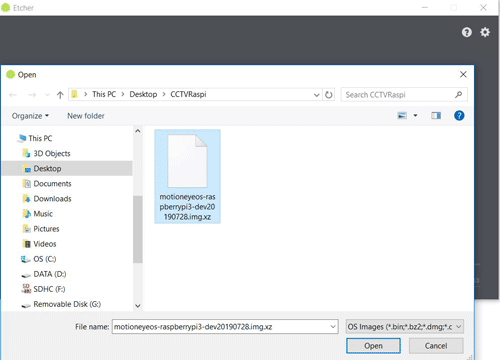
Download the image file named “motioneyeos-raspberrypi3-dev20190728.img.xz” from the following link “https://github.com/ccrisan/motioneyeos/releases/tag/nightly-dev”. Then download and install etcher “https://www.balena.io/etcher/” to burn the image file of the OS in SD card. Use a SD-card reader to connect SD card to your PC and format it before burning the OS. Open Etcher and select the path of the OS image file by clicking on “select image”.
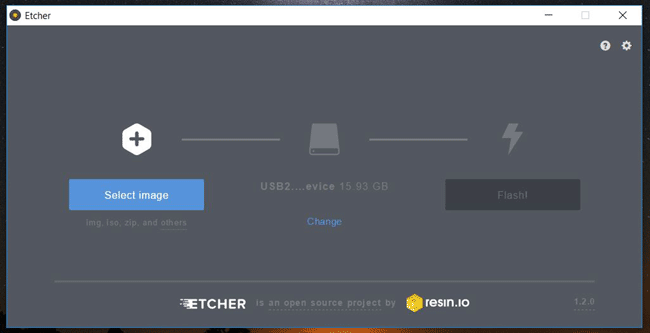
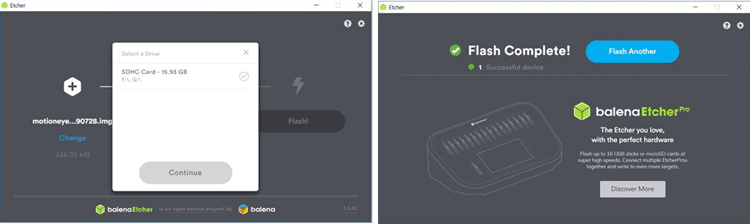
Etcher automatically picks up the SD card location if it is connected properly in its slot. If it doesn’t or if the microSD is at a different location, you can choose that by clicking on “change” under the middle icon. Click on flash to burn the image on the microSD card and remove it from your PC when it is done. (If a prompt appears in your computer asking for permission to execute the previous procedure, click on “yes” to continue)
Getting the IP Address of Raspberry Pi
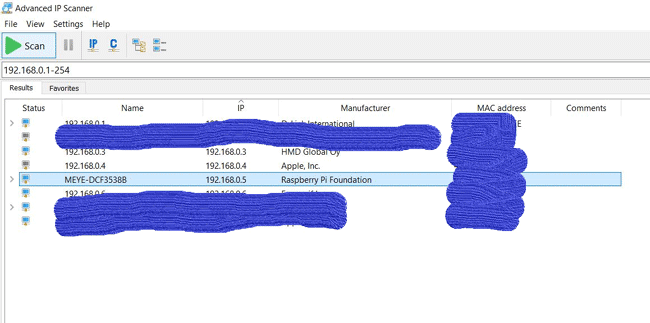
Place the microSD card back into its slot in the Raspberry Pi, power it on and connect a LAN cable. This is just a one-time process and you can omit the dependency on LAN cable completely after enabling Wi-Fi in your pi and entering its credentials. Install any IP scanner (ex: advanced IP scanner) on your system and use it to find the IP of your Raspberry Pi (which should be connected to the power supply and LAN cable by now). Note this IP down for the next step.
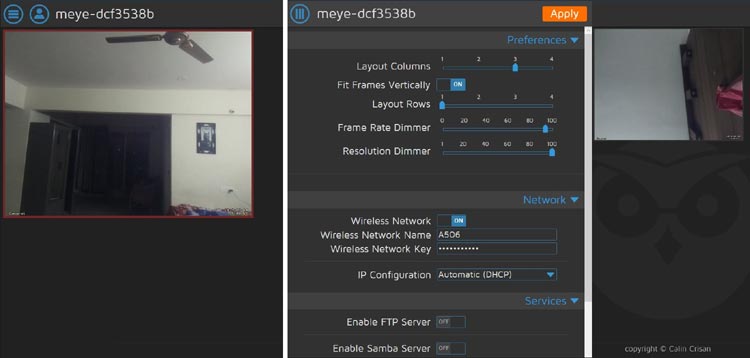
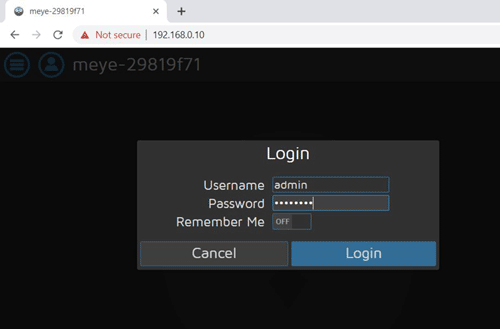
Open browser and enter the IP address noted in previous step (ex: 192.168.0.5). You should now be able to see the home screen of motion eye OS with real time video. Go to network and enable wireless network. Add your network SSID and password. Then click on apply and reboot. Disconnect the LAN cable and use IP scanner again to note down the IP address newly assigned to this Raspberry Pi (if there are multiple IP’s try each one to find the correct IP).
Configuring and adding the users to MotionEyeOS IP Camera
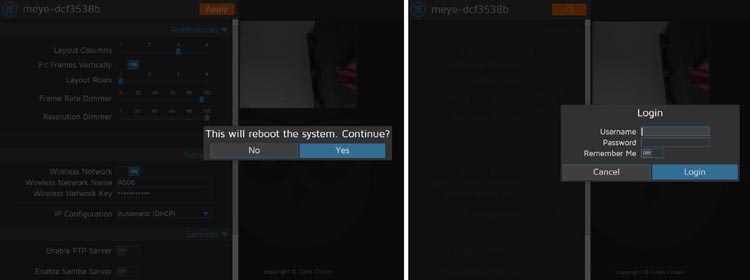
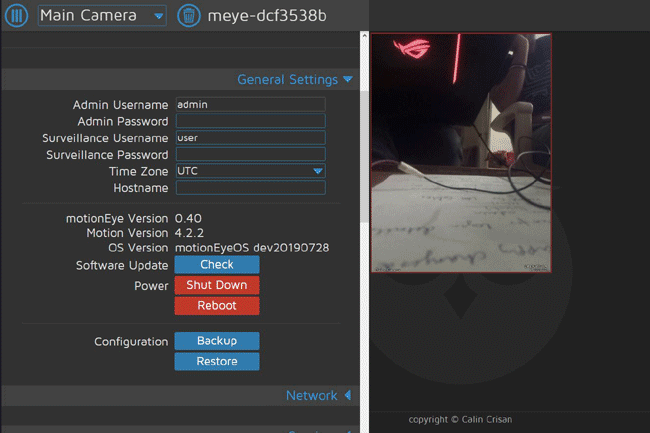
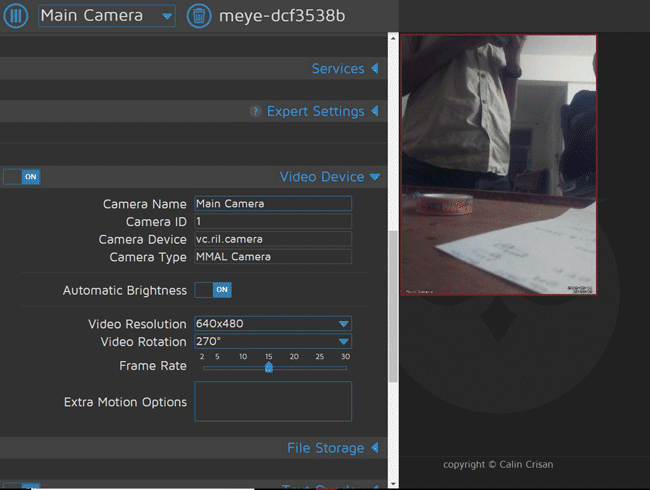
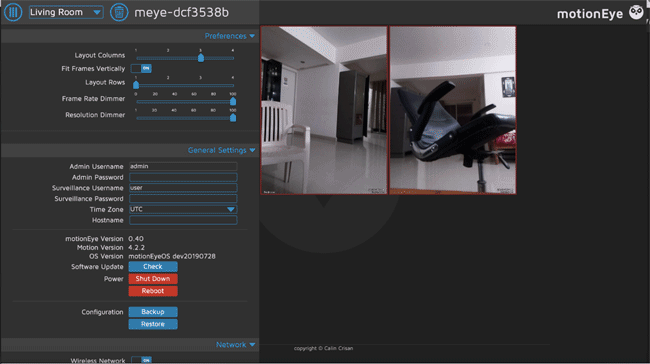
After reboot, open browser and enter the new IP address and add the username as “admin” and leave password blank (you can also set up a password), go to general settings to set up admin user name and password and time zone as per your location and then to video settings to choose a lower resolution for a faster frame rate. Feel free to play around with frame rate, video rotation etc. and set these as per your requirement. You can also change the name of the camera.
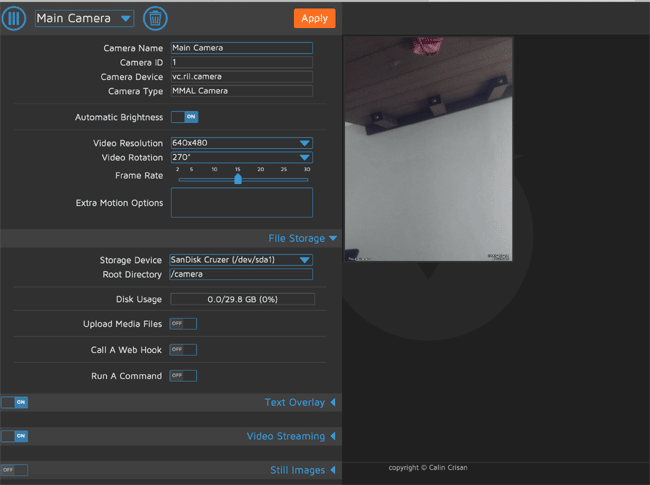
Go to file storage and select the storage device you connected. In my case it was sandisk pendrive. Give a root directory name (“\camera” in my case). Then click on apply and reboot the device.
Adding More Cameras in Raspberry Pi motionEyeOS
You can add multiple camera + Raspberry Pi units to this Raspberry Pi security camera system. Repeat the above steps for every device. Note that if you are using a Raspberry Pi zero, you need to upload the following image file to your microSD card from the MotionEyeOS releases page; motioneyeos-raspberrypi-xxxxxxxx.img.gz. Note down the IP of the second Raspberry Pi using your IP scanner. Open a new tab in your browser and enter this IP. Enter your Wi-Fi credentials following the steps mentioned above, disconnect the LAN cable and use IP scanner again to note down the IP address newly assigned to this Raspberry Pi.
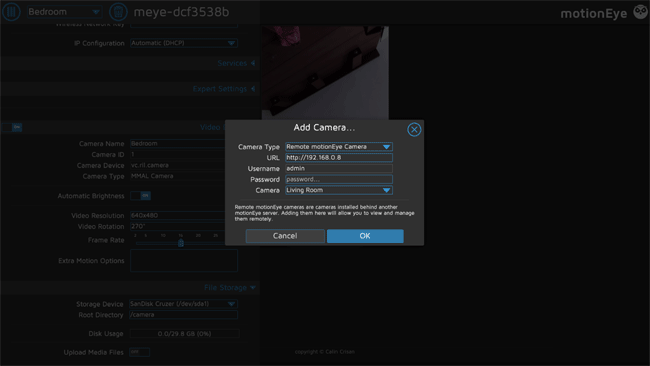
You can then add secondary cameras by going to the home screen of motionEyeOS. Go to the rectangular box adjacent to the settings icon and click on the downward facing arrow then click on “add camera”. Select “Remote motionEye camera” as camera type. In the box next to URL, type the IP address of the secondary device with “ http:// “ as a prefix (For example: http://192.168.0.8) . Keep username as “admin” (since this is the camera name by default). In case you assign a different name to the camera, then write that in the box). Click ok and wait for second camera to function.
Additional settings for Pi Zero
To build this Video Surveillance using Raspberry Pi Zero, there are some addition settings need to be done.
Open Notepad or any text editor, and create a new file called Wpa_supplicant.conf. Copy the following code in that file.
country=FR
update_config=1
ctrl_interface=/var/run/wpa_supplicant
network={
  ssid="extn2"
  psk="your-password"
  id_str="extn2"
}
Change country code to your country and add your network SSID and password. Copy this file to root directory of SD card
Accessing Video outside the Local Network
This surveillance camera using Raspberry Pi can, not only be accessed from local network, but also from anywhere in the world, we just need to do some tweaks in MotionEyeOS settings and in router settings.
Motion eye OS grants you the power to monitor your home from a different location! All you need is either a smartphone or a computer with internet access. The technique used to do this is called “port forwarding”.
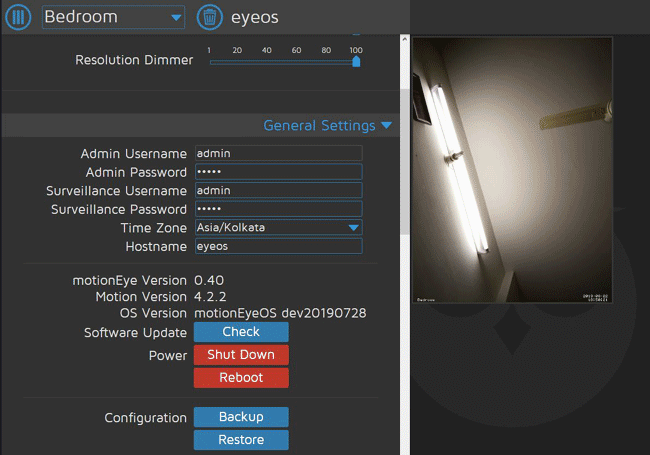
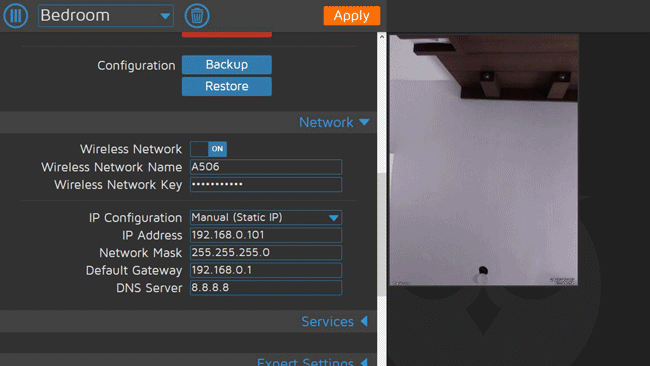
First, assign a static IP to your Raspberry Pi. Go to settings on the upper left corner of the motion eye OS homepage, scroll down till you find “general settings” and provide the necessary details under it. The username, password and host name can be of your choice and the time zone should correspond to your locality. Then, go down and check for updates. Scroll down further till you reach “Network”, change the IP to “manual(static IP)” then provide a static IP address; keeping “ 192.168” part same, type in 0 or 1 as per your gateway’s IP address then change the last three digits, keeping in mind that it should not be same as any other device connected to the same network.
Example: If your IP address is 192.168.0.100, keep “192.168.0” same and change the remaining three digits to 101.
Provide your default gateway next to the “Default gateway option”; example – 192.168.0.1. Either it is 0.1 or 1.1 for the last two digits. Then click on the orange colored “Apply” icon.
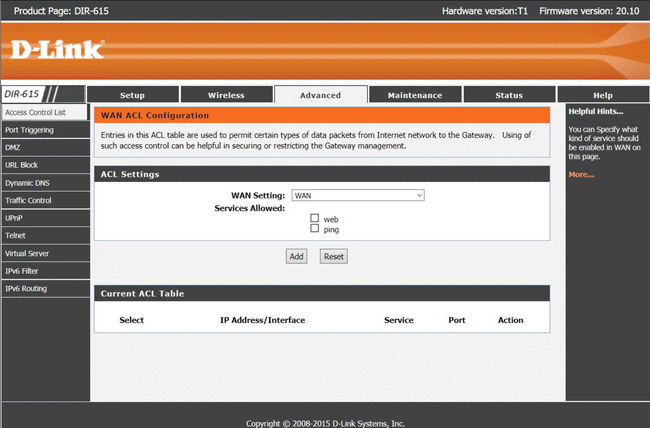
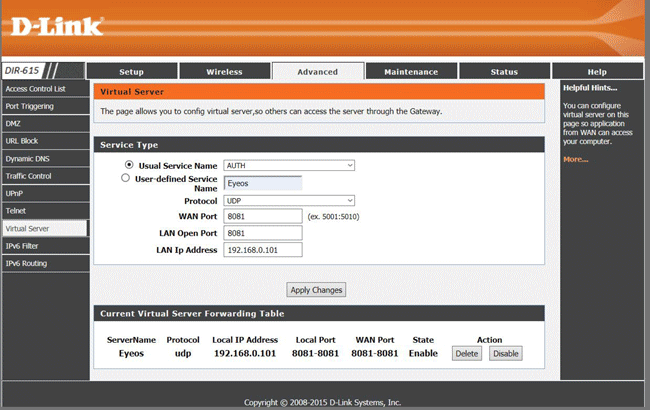
Go to your router page and login with your credentials and find out the port forwarding option; In my case it was under “Advanced”. It may be that it is give a different name – in my case it was named as “Virtual server”. Provide a service name of your choice, select protocol as UDP (If there is an option to select both UDP and TCP, then select it), add 8081 as WAN and LAN port, provide the IP address of your Raspberry Pi in the “LAN IP address option” and then click “apply changes”.
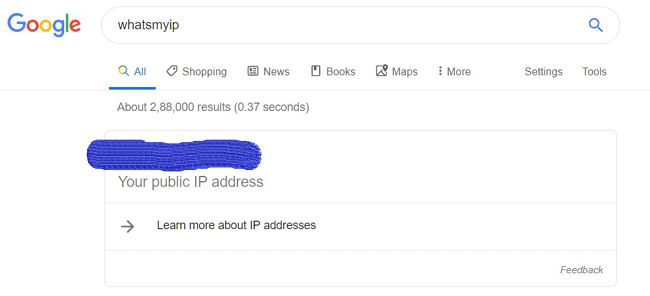
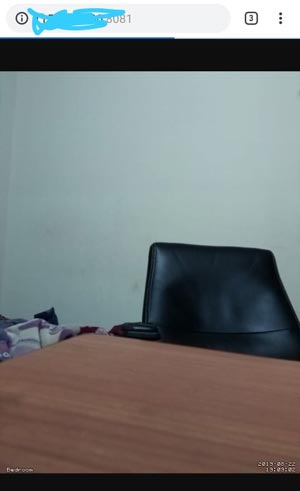
We now need public IP to access the videos real time. Google search “whatsmyip” to find your public IP and keep it with you. Use this IP to access the live feed from the cameras by typing the “<public IP>:8081” in the address bar of your remote device (smartphone, laptop or PC).
Record and Replay Videos in Raspberry Pi MotionEyeOS
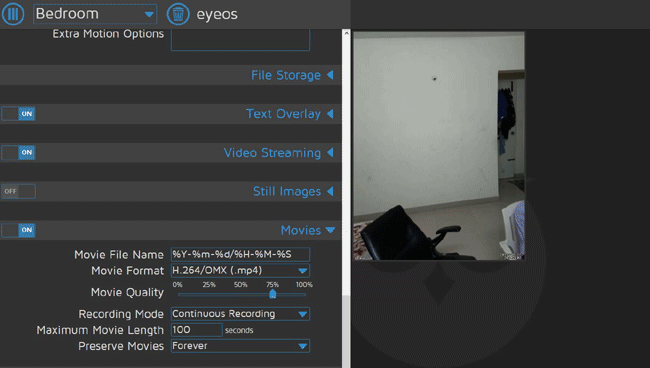
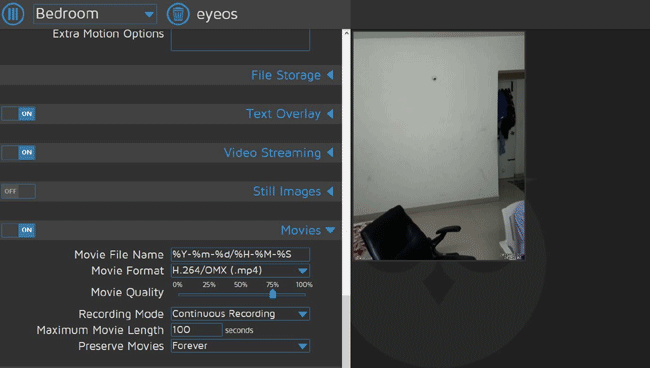
In order to record the videos from the cameras for future use, enable the recording feature by going to settings, scrolling down to “movies” and clicking on the toggle switch to change it to “ON” position. Feel free to change the movie quality as per your requirement, choose recording mode as “Continuous recording” or “Motion triggered” if you want to store just the suspicious activity. It is important to change the movie length to a suitable value so that motion eye OS can start recording and storing. It is recommended to choose one month or two months next to “preserve movies” so that the videos don’t eat up your memory.
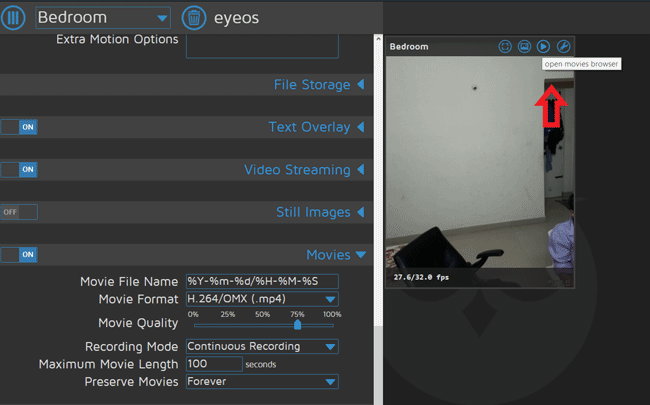
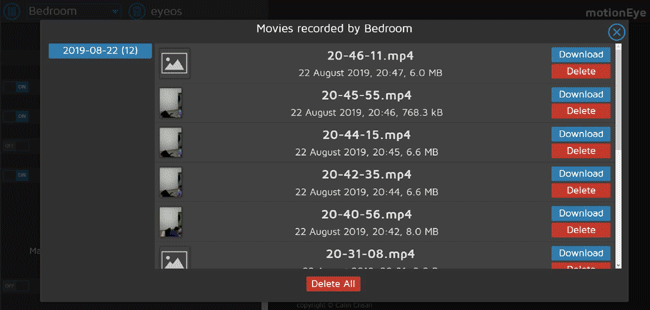
To access the recorded videos, navigate to “open movies browser” as shown in the image, and choose the appropriate option (download or delete). You can also play the video by clicking on it.
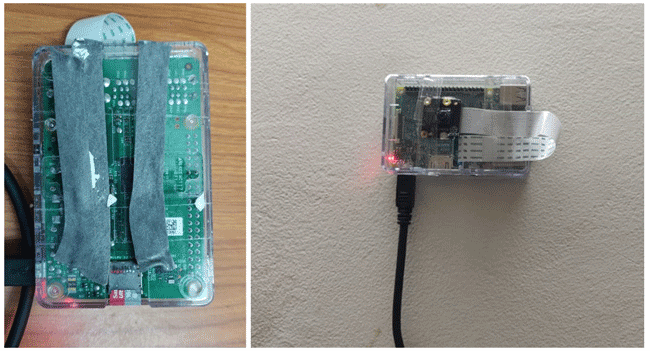
And then… finishing touches
Conclusion and Future Work
This system presents a simple way to monitor one’s home. Apart from the things shown in this post, additional features like high power IR LED’s for night vision can be added.


