


ESP32 is a powerful development tool for the prototyping of IoT application as it has inbuilt Bluetooth, Wi-Fi and features of a powerful microcontroller. For more details about ESP32 and its features you can refer previous articles of ESP32. There are various programming Environments available for ESP32 like Arduino IDE, Espressif-IDF, Lua, Micropython etc. We already learned to program ESP32 using Arduino IDE and using Espressif-IDF. Now in this article we will see how to use Lua language with ESP32 using ChiliPeppr’s Web IDE, flashing of Lua firmware on ESP32 for blinking LED using Lua script.
Prerequisite
- Windows PC
- ESP32
- USB cable
Programming your ESP32 from ChiliPeppr’s IDE
ChiliPeppr’s Web IDE is an online platform through which you can upload your Lua code to ESP32 board. It consists of a workspace which has a Serial Port JSON Server that you run locally or remotely on your computer to let your browser talk directly to your serial ports. There is a file browser for your ESP32, a serial port console, restart button, file saving, run, upload/run, etc.
To start working with ChiliPeppr’s Web IDE follow the steps below:
- Open your web browser and search for:
http://chilipeppr.com
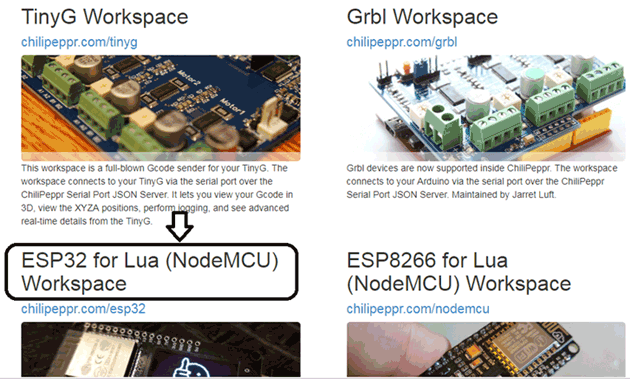
- You will find below window which consists of various workspace like TinyG, ESP32 for Lua, ESP8266 for Lua, etc. Click on ESP32 for Lua Workspace.
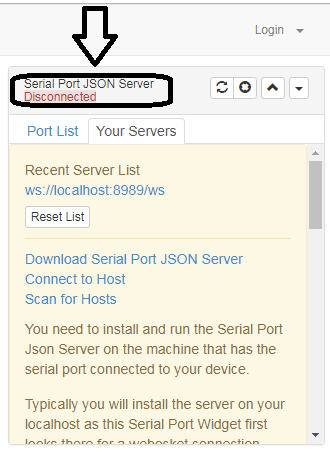
- You will find below window after opening the workspace, if your ESP32 is not connected to any port of your PC or showing Disconnected then you have to download Serial port JSON server as I told earlier that this IDE has a Serial Port JSON server which let your browser talk directly to your ports.
- To download JSON Server click on ‘Download Serial Port JSON Server’. On clicking it will direct you to a github link. You have to click on this link.
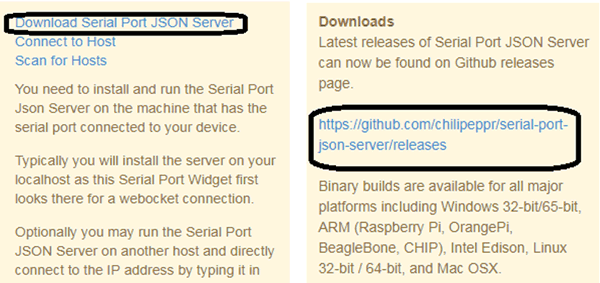
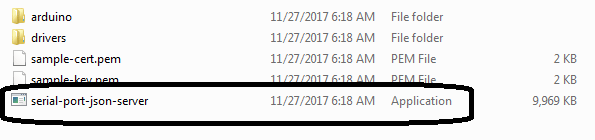
- There are different JSON servers are available in this repository, depending on your PC you have to download from here, e.g. I am using Windows 64 bit so I will download Server for windows 64 bit.
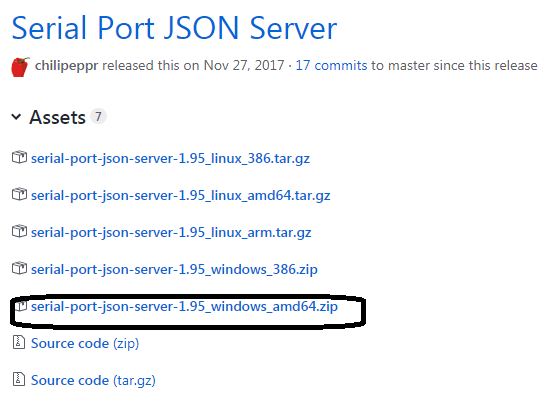
- A zip file will be downloaded, unzip it and extract it where you want in your PC.
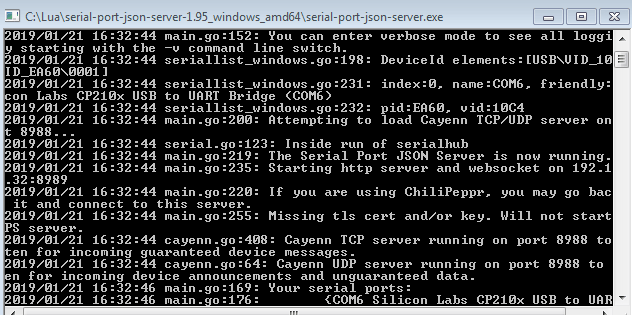
- After extracting open it and run the Serial port json server application and you will find that a window will appear which shows on which port your ESP32 is connected.
- Minimize this command window and open your ChiliPepr’s workspace again in the browser. Please don’t close this window just minimize it.
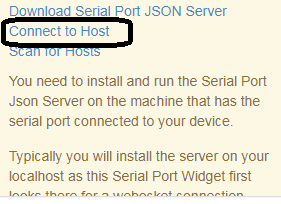
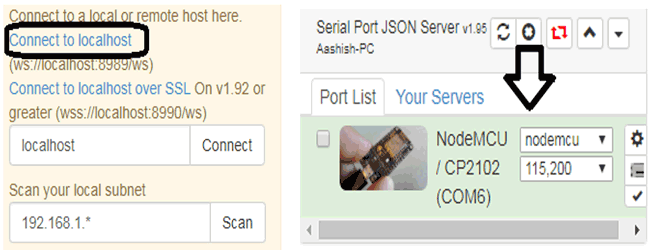
- Now click on Connect to host and then connect to local host and then it will show your ESP connected with the particular port to which you connect.
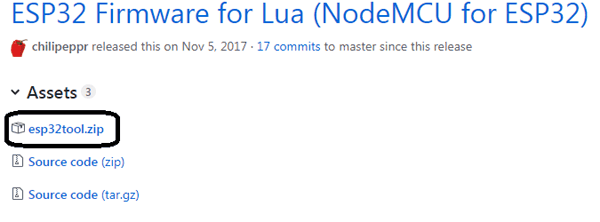
- Now, download the esp32tool.zip from below github link. ChiliPeppr has a pre-compiled firmware for ESP32 for Lua in this file on the github repository.
https://github.com/chilipeppr/workspace-esp32-lua/releases
- After downloading it extract the file in the same directory in which you extracted previous file.
- Now you also need Python 2.7.X or 3.7.X in your PC for flashing of Lua firmware if you have python in your PC then it is fine if you don’t have it then you can install python in your PC in the following manner:
To install Python 3 following steps should be performed:
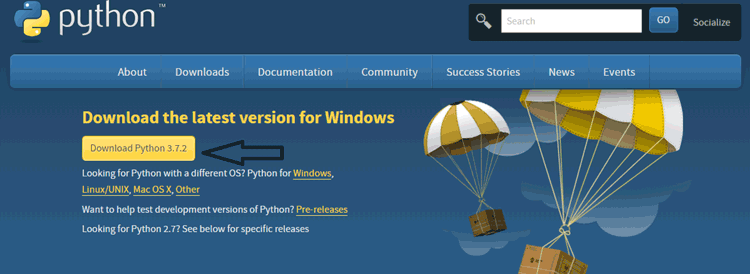
- Open your web browser and search for the given link:
https://www.python.org/downloads/
- After this, you will find a window as shown in figure below. Click on Download Python 3.7.2 to download Python 3.
- After downloading the file install it in your PC and after installing you will get a message on your screen i.e. Setup was successful this means that Python 3.7.2 is successfully installed in your PC.
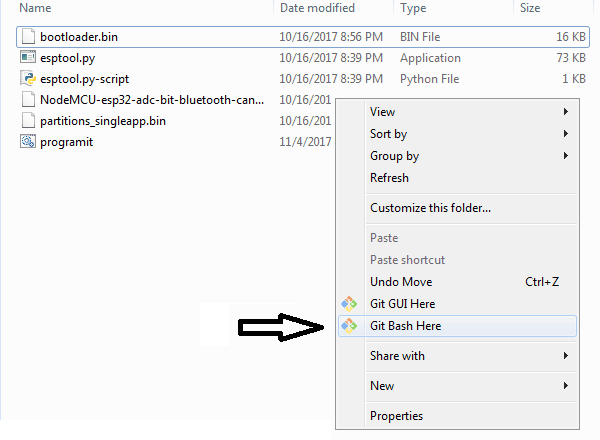
- After installation of Python and download the esp32tool.zip, open command line to the directory you extracted esp32tool.zip into. I have my default Git bash command line so I will open git bash you can open command prompt or windows powershell also.
- Now, install esptool.py from pip by running the below command in your command line:
pip install esptool
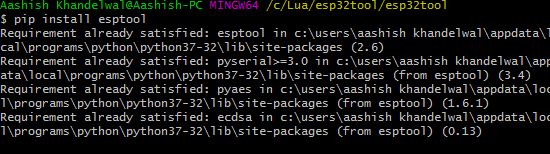
In my PC it is already installed but if you are installing pip first time then it will take some time to install, you just have to give above command.
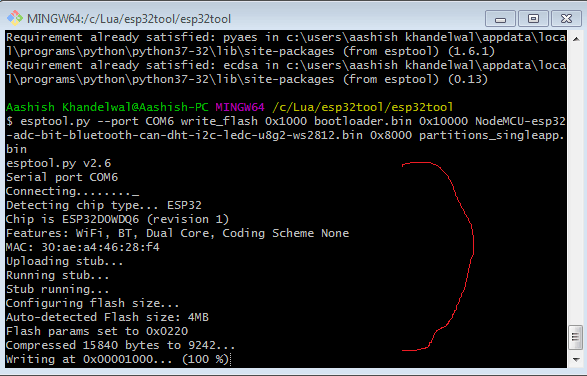
- Now, run the below command in your command line but make sure that you should select correct serial port according to your port to which ESP is connected.
esptool.py --port COM6 write_flash 0x1000 bootloader.bin 0x10000 NodeMCU-esp32-adc-bit-bluetooth-can-dht-i2c-ledc-u8g2-ws2812.bin 0x8000 partitions_singleapp.bin
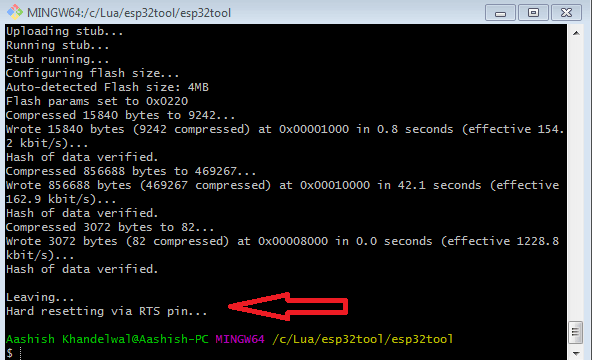
- After running this command firmware starts flashing in your ESP and you will see below window.
- After complete firmware is flashed in your ESP you will seecommand “Hard resetting via RTS pin…”, it means Lua firmware is flashed into your ESP.
ESP32 LED Blinking using ChiliPeppr’s Web IDE
After uploading Lua firmware in your ESP32, now you are ready to work with your ESP using Lua script, you can do various sample examples like blinking of LED, sending data to cloud, etc. Many examples are already given in workspace of your ChiliPeppr’s IDE. First of all I will explain you about whole workspace of this IDE so you can be familiar with this and then I will demonstrate you one example i.e. LED blink.

Following are the components of this ChiliPeppr’s Web IDE:
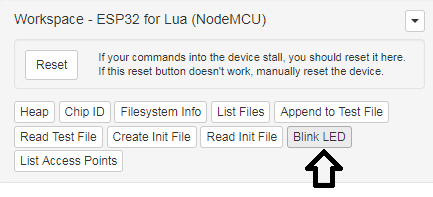
- Workspace:- It contains Reset button by which you can reset your ESP directly and some example files also.
- Lua Editor:- This section is where you can type your code and upload it to your ESP32.
- Serial Port JSON Server:- It contains port list and tells which device is connected to your PC. This server gives a facility to communicate with Serial ports using your browser.
- Console: It is just like output window, it gives you details about any error and code executing process.
- Firmware/Docs/Sample code:- This section contains details about firmware and documentation which will help you know about IDE and firmware and also contains sample code which helps you to execute sample program on your ESP32.
Now I will explain you the steps involving in blinking of your ESP32:-
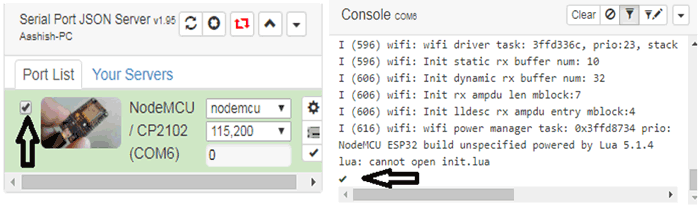
- In your ChiliPeppr’s Web IDE go to Port list and select your board after selecting you will see in console window that a message will be shown and a green tick will come which means you can now communicate with this platform if this sign will not come then you have to connect your ESP again and check again, if you are facing this problem again and again then upload firmware again in a proper manner.
- Now in your Workspace click on Blink LED and after clicking you can see a message will be shown in console.
- Now go to Sample code and click on Editor.

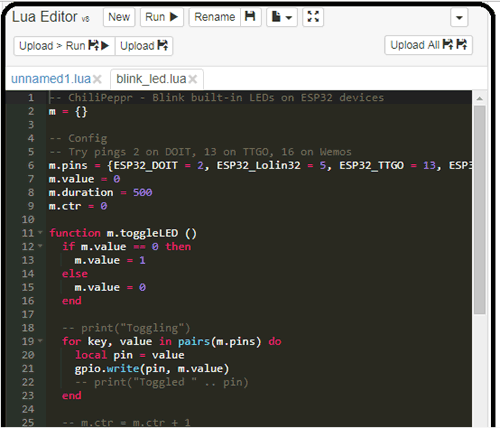
- Now you can see in editor a code will be as shown in figure below. You can also edit the code as you want and then click on Upload button.
- After uploading you can see that LED on your ESP32 starts blinking if it is not then click on Reset button and upload it again.

This is how you are successfully able to work with Lua script on your ESP32.


